Makeup brushes are essential tools for creating a smooth, flawless makeup look. From blending foundation to applying eyeshadow, the right brushes help makeup sit evenly on the skin. However, brushes can collect foundation, powder, oil, dead skin cells, and product residue with regular use.
If you rarely clean your makeup brushes, the buildup can affect their performance and contribute to skin irritation or clogged pores. Dirty brushes may also become stiff, making it harder to blend products properly.
The good news is that cleaning makeup brushes does not require expensive equipment or complicated techniques. With a gentle cleanser, lukewarm water, and a few minutes of care, you can keep your brushes clean and in good condition.
This step-by-step guide explains how to clean makeup brushes properly, how often to wash them, and how to dry them without damaging the bristles.
Why Is It Important to Clean Makeup Brushes?
Regular brush cleaning helps remove makeup residue, excess oils, and accumulated debris. Clean brushes can distribute products more evenly and make blending easier.
There are several reasons to make brush cleaning part of your beauty routine:
- Better makeup application: Clean bristles help foundation, blush, and eyeshadow blend more smoothly.
- Improved hygiene: Washing removes much of the product buildup and contamination that accumulates during use.
- Potentially less irritation: Keeping brushes clean may help reduce exposure to irritating residue and unwanted microorganisms.
- Longer brush life: Gentle cleaning helps prevent bristles from becoming stiff or coated with old makeup.
Cleaning does not make a brush completely sterile. However, consistent washing is an important part of maintaining good makeup hygiene.
What Do You Need to Clean Makeup Brushes?

Before starting, gather a few simple supplies:
- Lukewarm running water
- A gentle brush cleanser or mild fragrance-free cleanser
- A clean towel
- A small bowl, if needed
- A brush-cleaning mat, optional
A cleanser specifically designed for makeup brushes is a good choice because it is intended to remove cosmetic residue. Avoid harsh household cleaners, strong solvents, and products that could irritate your skin or damage the bristles.
Step-by-Step Guide to Cleaning Makeup Brushes
Step 1: Separate Brushes by Product Type
Begin by grouping your brushes according to how you use them. Foundation and concealer brushes usually collect more creamy or oily products, while powder and blush brushes may hold loose pigment.
Cleaning similar brushes together can make the process easier, but each brush should still be washed individually.
If a brush has been used around an eye infection or on irritated skin, avoid sharing it and follow appropriate hygiene guidance.
Step 2: Wet the Bristles Carefully
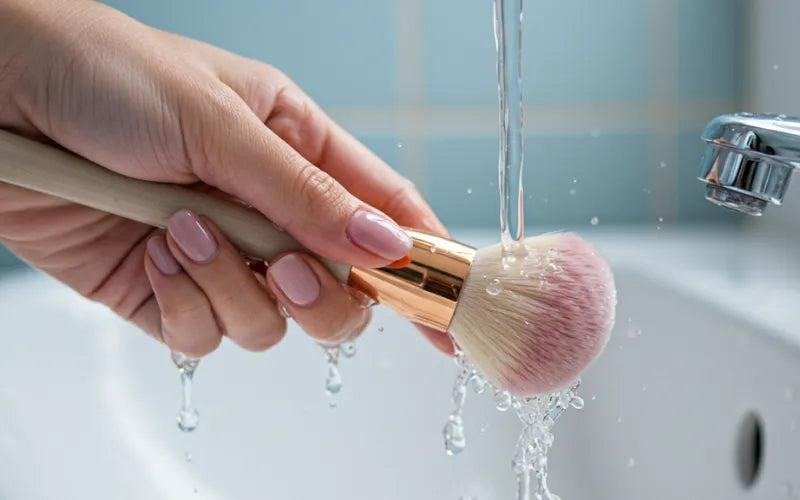
Hold the brush with the bristles pointing downward and gently wet them with lukewarm water.
Try to keep water away from the metal ferrule and handle joint. Water entering this area can weaken the adhesive over time, potentially causing the bristles to loosen or the handle to deteriorate.
Avoid soaking the entire brush in a bowl of water. A controlled rinse is usually sufficient.
Step 3: Apply a Gentle Cleanser
Place a small amount of brush cleanser in your palm or on a cleaning mat. Gently swirl the wet bristles through the cleanser until it begins to lift the makeup residue.
Use light circular movements rather than pressing the brush aggressively against your hand. Heavy scrubbing can bend the bristles, damage their shape, and shorten the brush’s useful life.
For foundation brushes with stubborn product buildup, repeat the process with a little fresh cleanser.
Step 4: Rinse Until the Water Runs Clear
Rinse the bristles under lukewarm water while gently separating them with your fingers. Continue until the water runs clear and no visible foam or makeup remains.
If the brush still feels coated or releases colored residue, repeat the washing process.
Do not pull or twist the bristles forcefully. Instead, squeeze them gently to remove excess water while maintaining the original brush shape.
Step 5: Remove Excess Water
Use a clean towel to blot the bristles. Press gently to absorb moisture without rubbing them roughly.
Reshape the bristles with your fingers so the brush returns to its original form. This step is especially important for flat foundation brushes, angled brushes, and smaller eyeshadow brushes.
Step 6: Dry Brushes Properly
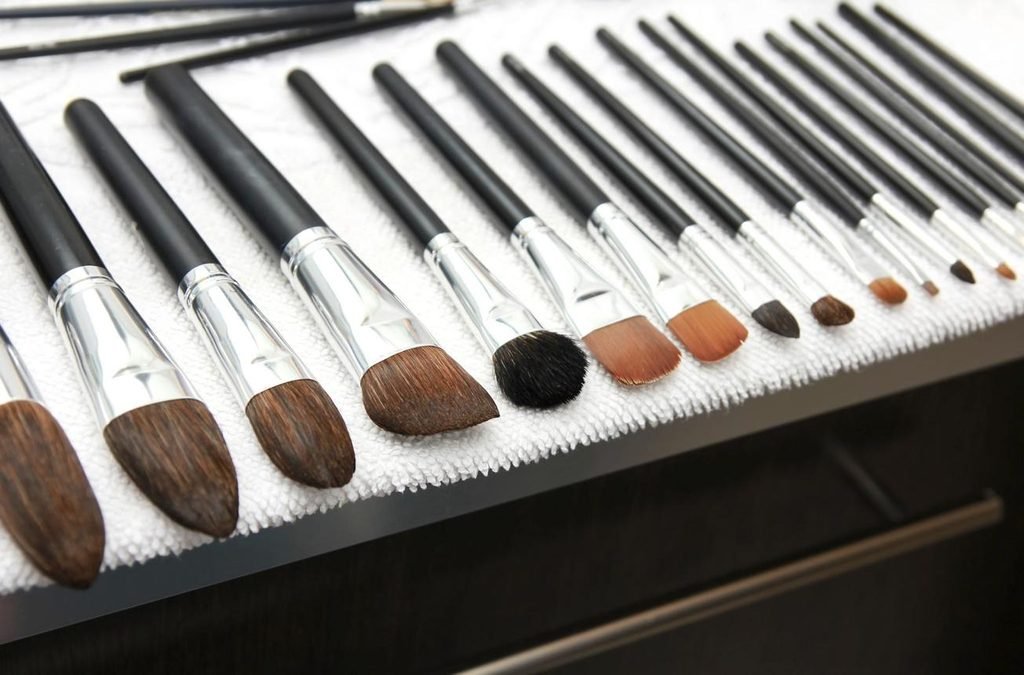
Place the brushes horizontally on a clean towel with the bristles extending slightly over the edge of a counter, if possible. This allows air to circulate around the bristles and helps prevent moisture from collecting near the handle.
Let the brushes dry completely before using or storing them. Avoid standing wet brushes upright, as water may travel toward the ferrule.
Do not use high heat from a hair dryer or place brushes directly on a radiator. Excessive heat can damage the bristles and adhesive.
How Often Should You Clean Makeup Brushes?
The ideal cleaning schedule depends on the type of brush, how frequently you use it, and your skin’s needs.
| Brush type | Suggested cleaning frequency |
| Foundation and concealer brushes | About once a week |
| Powder, blush, and bronzer brushes | Every 1–2 weeks |
| Eyeshadow brushes | About once a week, especially with frequent use |
| Brushes used for different colors | Clean between colors when needed |
| Brushes used around irritated or infected skin | Clean promptly and follow appropriate hygiene advice |
These are practical guidelines rather than strict medical rules. Brushes used daily or with liquid and cream products may need more frequent washing.
If you have acne-prone or sensitive skin, regular cleaning is particularly worthwhile. Also, avoid sharing makeup brushes, especially brushes used around the eyes and mouth.
Common Makeup Brush Cleaning Mistakes to Avoid
Even when you clean your brushes regularly, certain habits can cause damage.
Using hot water: Very hot water may affect adhesives and delicate bristles. Lukewarm water is generally a better choice.
Scrubbing too aggressively: Excessive pressure can deform the bristles and make brushes less effective.
Using harsh products: Strong detergents and solvents may leave residue or damage the brush material.
Storing brushes while damp: Moisture trapped in a closed container can encourage unwanted microbial growth. Always allow brushes to dry fully.
Ignoring the brush handles: Wipe handles periodically with a suitable cleaner, taking care not to soak the ferrule or handle joint.
Frequently Asked Questions
Can I use regular shampoo to clean makeup brushes?
A small amount of mild shampoo may work for some brushes, but a dedicated brush cleanser is a reliable option. Avoid harsh formulas and rinse thoroughly to remove all residue.
Can I clean makeup brushes with dish soap?
Some mild dish soaps can remove oily makeup, but stronger formulas may be harsh on certain bristles or leave unwanted residue. A gentle brush cleanser is generally preferable.
How long do makeup brushes take to dry?
Drying time varies depending on brush density, room temperature, and humidity. Small brushes may dry within several hours, while dense foundation brushes can take longer. Wait until the bristles and their base are completely dry before using them.
Should I replace makeup brushes instead of cleaning them?
Not necessarily. Properly maintained brushes can last for years. Replace brushes when they shed excessively, develop persistent odors, become damaged, or cannot be cleaned effectively.
Explore more beauty tips and product insights in the NAILVRA Journal.